home improvement project: Phase I
boy did i spend a physical weekend. my neighbor put a pool in last fall, and asked me if i'd like the pavers he'd pulled to install the pool. so i said "hmmm. YES"
see, i have this area in the back yard that was probably a great garden spot once upon a time. but over the years the trees in the area grew so big that the spot is in constant shade. not good for veggies or roses. so i'd been thinking about tearing the area up and doing something different. Carl's offer of pavers solidified my idea.
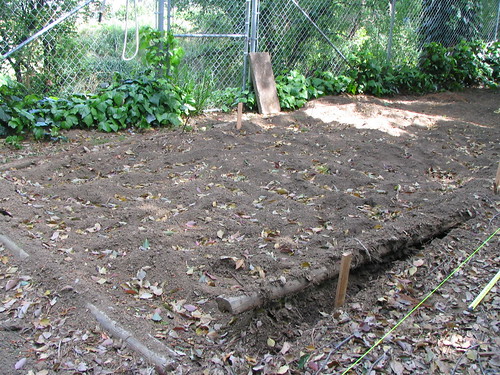
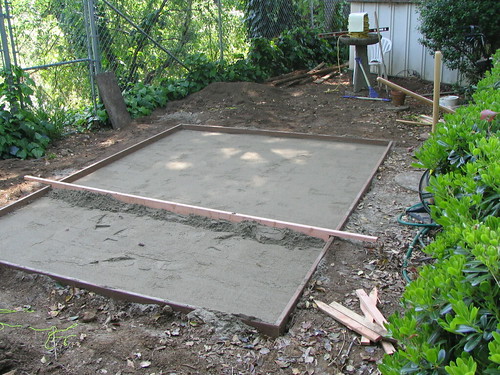
here's the area, a before picture if you will. i'd already moved some dirt out to level the spot a bit.
as always, click pix for other size options
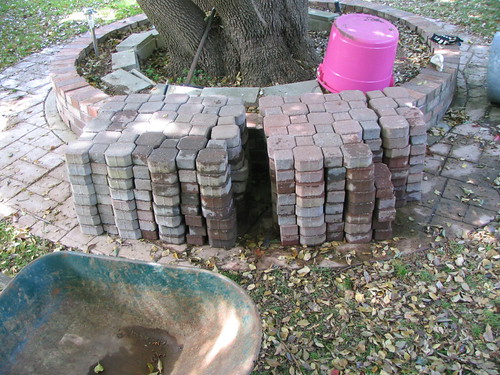
then i had to clean all the pavers, since they will not fit up properly if there is any residual mud or junk. after cleaning (an all day affair i might add), i separated and stacked them in the back yard.
day 2, i laid out the area, framed the patio and leveled the frame. this section has a slope, so i had to move some serious dirt to get this accomplished. then i dug down for a 2 to 3 inch sand base. the patio section measures about 8 x 12 feet.
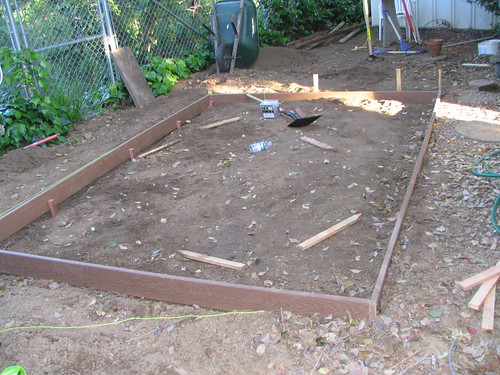
then i tamped the area to compact the base. note the large amount of dark surrounding the area in this picture. i may not work fast, but i work until i achieve that day's goal, even if it is after dinner....

day 3: sand. 3/4 yard of sand. wheeled from the front drive to the back, shoveled in, spread around, and eventually leveled. after the initial leveling, i tamped it lightly to settle the sand in place:
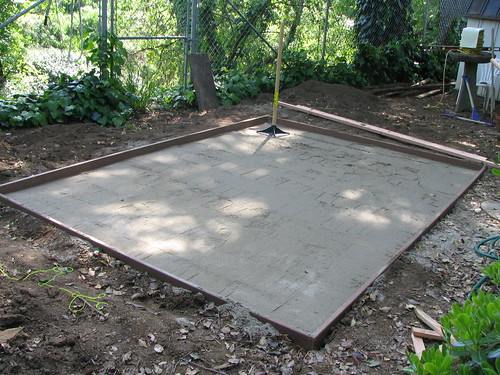
a few shovels of sand in front of the screeding board, and pull to final level:
then i laid the cobbles in a 45 degree herringbone pattern. that means i alternated both paver color and direction for each course. since this is old cement, most of the color segregation entail a lot of guessing...
after the pavers were laid, i dumped a 50 pound bag of 30 mesh silicate sand on top and swept it around. this allows the sand to fall between each of the pavers, filling the cracks. that in turn helps set the pavers so they don't shift and buckle. this took almost the entire bag to fill the cracks. i was amazed how much sand it took. if you stand on the deck, the pavers are interlocked together tightly, and it doesn't look like there is any space between them. toss on the sand, and it looks like there is a canyon's worth of space between.
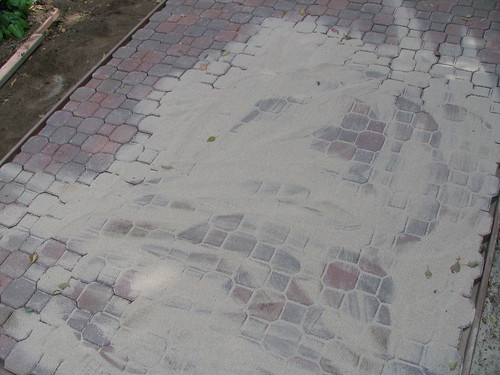
next i took the tamper and set all the pavers lightly by going over the entire surface a couple of times. bump, move, bump move, repeat...
then i hosed it all down to wash the sand into the spaces better, added more sand, and will leave it like that for a couple of days. by leaving the sand on and walking on it for a couple of days, more sand will fill the spaces and further set the pavers. little trick a contractor buddy of mine passed on.
so here's the final shot. it has sand on it, but this is what the patio looks like.
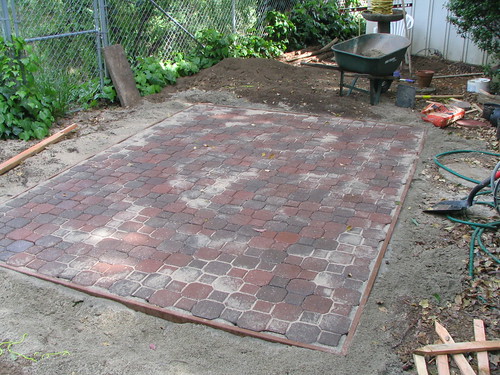
phase II will see a sun cover built, cement boarder walk laid, an 8 1/2 foot circle of pavers set to the side for a BBQ area (about where the wheel barrow is), and who knows what else. hey, it's still early in the year...
here's a link to all the photos in the set for phase I on flickr. LINK
see, i have this area in the back yard that was probably a great garden spot once upon a time. but over the years the trees in the area grew so big that the spot is in constant shade. not good for veggies or roses. so i'd been thinking about tearing the area up and doing something different. Carl's offer of pavers solidified my idea.
here's the area, a before picture if you will. i'd already moved some dirt out to level the spot a bit.
as always, click pix for other size options
then i had to clean all the pavers, since they will not fit up properly if there is any residual mud or junk. after cleaning (an all day affair i might add), i separated and stacked them in the back yard.
day 2, i laid out the area, framed the patio and leveled the frame. this section has a slope, so i had to move some serious dirt to get this accomplished. then i dug down for a 2 to 3 inch sand base. the patio section measures about 8 x 12 feet.
then i tamped the area to compact the base. note the large amount of dark surrounding the area in this picture. i may not work fast, but i work until i achieve that day's goal, even if it is after dinner....
day 3: sand. 3/4 yard of sand. wheeled from the front drive to the back, shoveled in, spread around, and eventually leveled. after the initial leveling, i tamped it lightly to settle the sand in place:
a few shovels of sand in front of the screeding board, and pull to final level:
then i laid the cobbles in a 45 degree herringbone pattern. that means i alternated both paver color and direction for each course. since this is old cement, most of the color segregation entail a lot of guessing...
after the pavers were laid, i dumped a 50 pound bag of 30 mesh silicate sand on top and swept it around. this allows the sand to fall between each of the pavers, filling the cracks. that in turn helps set the pavers so they don't shift and buckle. this took almost the entire bag to fill the cracks. i was amazed how much sand it took. if you stand on the deck, the pavers are interlocked together tightly, and it doesn't look like there is any space between them. toss on the sand, and it looks like there is a canyon's worth of space between.
next i took the tamper and set all the pavers lightly by going over the entire surface a couple of times. bump, move, bump move, repeat...
then i hosed it all down to wash the sand into the spaces better, added more sand, and will leave it like that for a couple of days. by leaving the sand on and walking on it for a couple of days, more sand will fill the spaces and further set the pavers. little trick a contractor buddy of mine passed on.
so here's the final shot. it has sand on it, but this is what the patio looks like.
phase II will see a sun cover built, cement boarder walk laid, an 8 1/2 foot circle of pavers set to the side for a BBQ area (about where the wheel barrow is), and who knows what else. hey, it's still early in the year...
here's a link to all the photos in the set for phase I on flickr. LINK
Labels: back yard, home improvement, patio, pavers
posted by bothenook at 20:16
![]()
![]()


1 Comments:
Impressive--now come and do mine...oh, wait, I don't have a yard. You're off the hook for now. LOL
Wondering what you used as a tamper for the sand and then later for the pavers--can just imagine you giving the old submariner rubber-mallet to the pavers! Also, how is the frame supported/held in place?
Post a Comment
<< Home